Embedded Programming//
Installing the right drivers
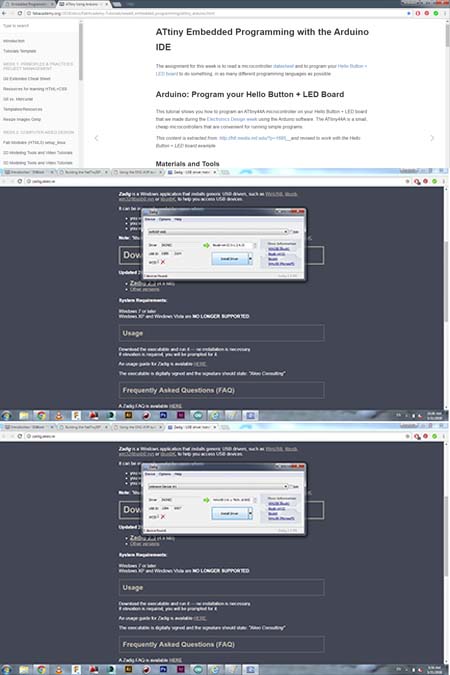
Firstly, in order to program the attiny44 with Arduino, the original free version of arduino had to be downloaded and installed. The next step was the download of the right drivers since they are the most essential step of programming the right USB. All the procedure was followed by the turorial of fab network and the drivers were downloaded from zadig.akeo.io
Installing the VCP drivers
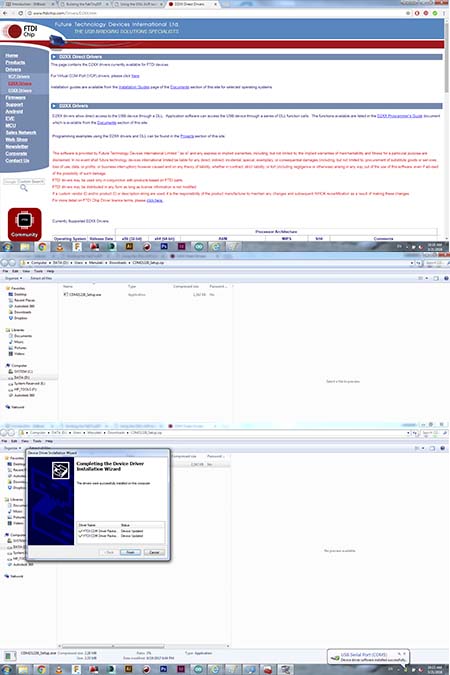
The installation of the VCP drivers for windows 64bit happened according to the fab tutorials and they were downloaded from http://www.ftdichip.com. After the downloading i updated the usb drivers, i run the installation procedure and i was ready to start programming.
Arduino programming 1
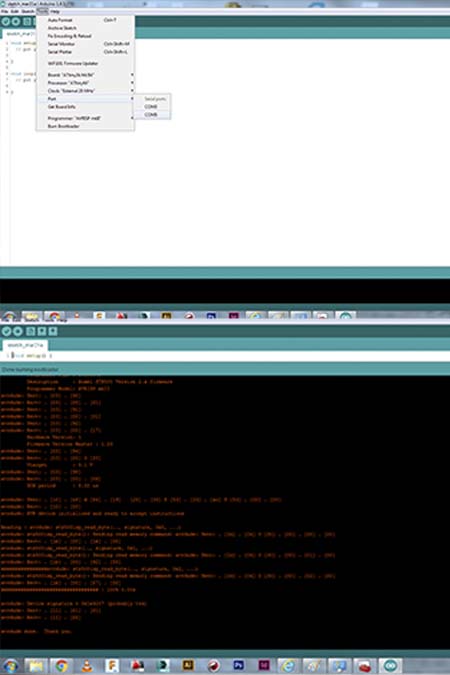
The next step was to get familiar with the arduino software. Arduino shares the almost the same coding philosophy as other similar programmes and it was not so hard for someone to navigate himself in the program. Firstly, i chose the right attiny(attiny 24/44/84),prosessor(attiny44), clock(20 Mhz external) serial port (COM5) and then immediatelly i burned the bootloader exactly as depicted in the pictures above.The result was succesful.
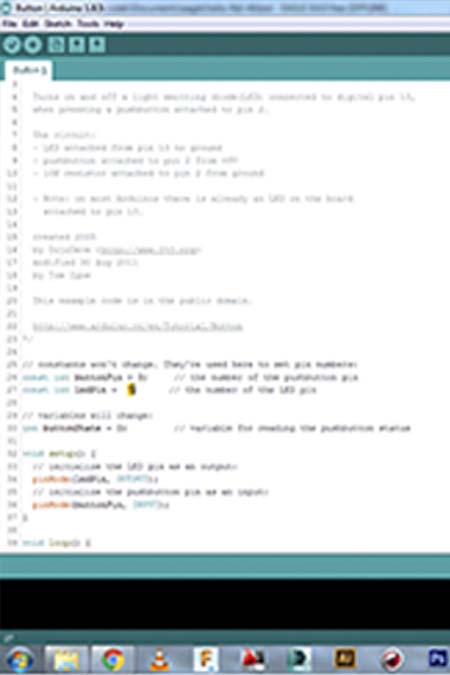
Uploading the right code
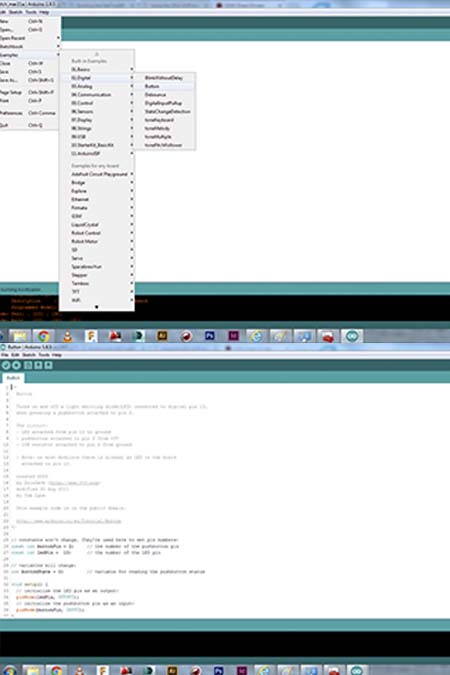
The blinking code was the next step and the path was file-examples-digital-button and the right code appeared in arduino's working space.
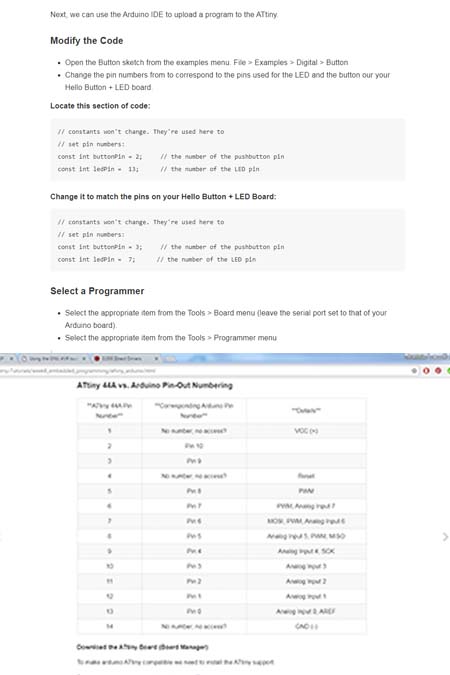
Modifying the code
The next step was to change the pin numbers in order to to correspond to the pins used for the LED and the button our your Hello Button + LED board. For this i followed again the tutorial of fab network.
Adding the right values
The right values were adding according to the tutorial and as depicted in the pictures.I Made sure that my board was plugged into the computer via the FTDI cable and that my FabISP was connected to the 6 pin programming header on the Hello Button + LED board. I upload the sketch to my Hello Button + LED board by selecting the arrow button in the Arduino IDE.
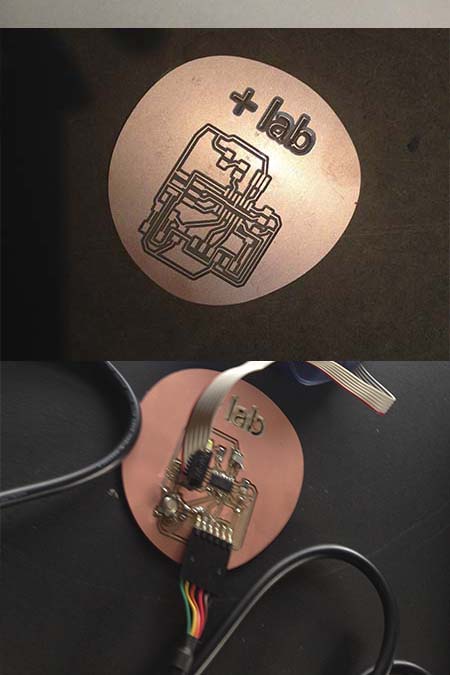
The blinking led
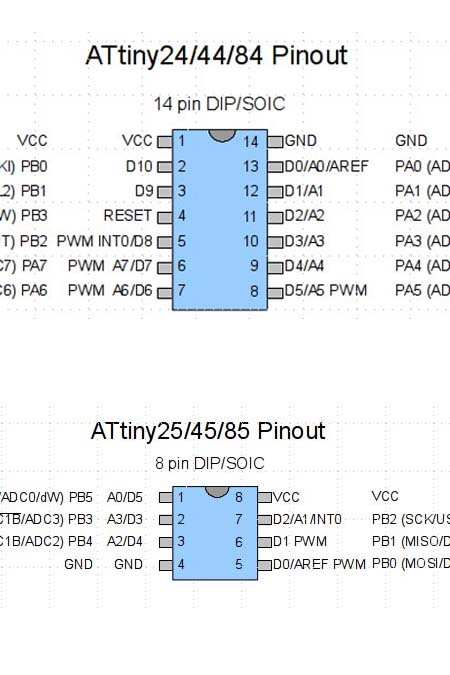
Attiny 44 and 45 pins.
Before i finish my documentation i believe that is important to inform about the attiny 44 and 45 pinout. Anytime from now on that we will need to program in arduino a board we will need to change the pins according to the microcontroller that we will use. Here is the pinout map.For the hello echo board i used the attiny 44.
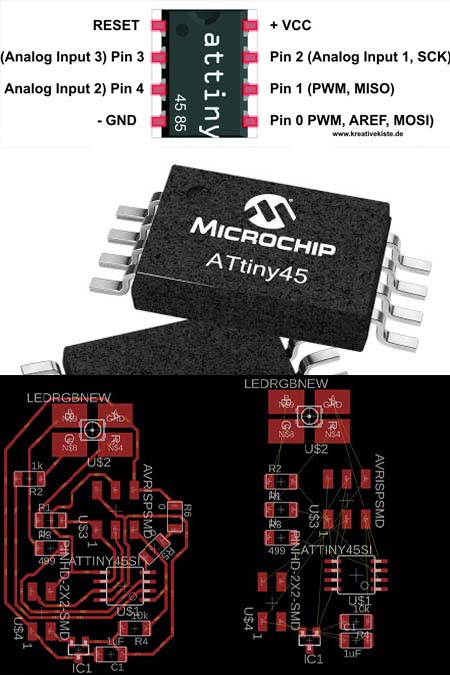
Attiny 45
For my final project i used attiny 45 due to the number of pins that it was needed for my input and output device.You can see my input and output devices in these links input and output.The characteristics of the attiny 45 are Program Memory Type Flash, Program Memory Size (KB) 4, CPU Speed (MIPS/DMIPS) 20, SRAM Bytes 256, Data EEPROM/HEF (bytes) 256, Digital Communication Peripherals 1-SPI, 1-I2C, Capture/Compare/PWM Peripherals 5PWM, Timers 2 x 8-bit, Number of Comparators 1, Temperature Range (C) -40 to 85, Operating Voltage Range (V) 1.8 to 5.5, Pin Count 8.
Technical specifications//
HOW I MODIFIED A CODE IN ARDUINO//Step 1_ I Opened the arduino software and i went to examples -> digital -> button and opened the file. Step 2_ This is the arduino code that programed my Hello board to turn on the led with a push of the button. The code refers to the pins of Arduino Uno so the first thing was to change the pins with the right pins of out board. This meant that i should checked the hello board and the schematics and spoted in which pin is the button and the led placed. Step 3_ After checking where was the right led and button pins i needed to replaced them in this part of the code // constants won't change. They're used here to set pin numbers: const int buttonPin = PA3; // the number of the pushbutton pin const int ledPin = PA7; // the number of the LED pin. Step 4_ I complied the code and then looked for possible mistakes. Step 5_ When the code was verified i uploaded the code. Step 6_ everything was fine and the hello board was ready. I pushed the button and checked that the led turned on. In case of errors, i read the message carrefully and tied to google the erros. It worked.
Conclusions//
The conclusion of this week is that electronic programming is a very precise procedure that is based on logic facts. The same conclusion stands also for the arduino coding.